1 + 2[1] 3R is a programming language. R is a popular language for data analysis.
RStudio is software application that can make it easier to write and run R code.
There are different ways to start RStudio.
People who attended the in-person workshop, should follow the instructions on Setup > Restart Codespace
People who are doing this course as a self-paced course should follow the instructions on Restart Codespace or start RStudio on their computer.
We will use the RStudio integrated development environment (IDE) to write code into scripts, run code in R, navigate files on our computer, inspect objects we create in R, and look at the plots we make.
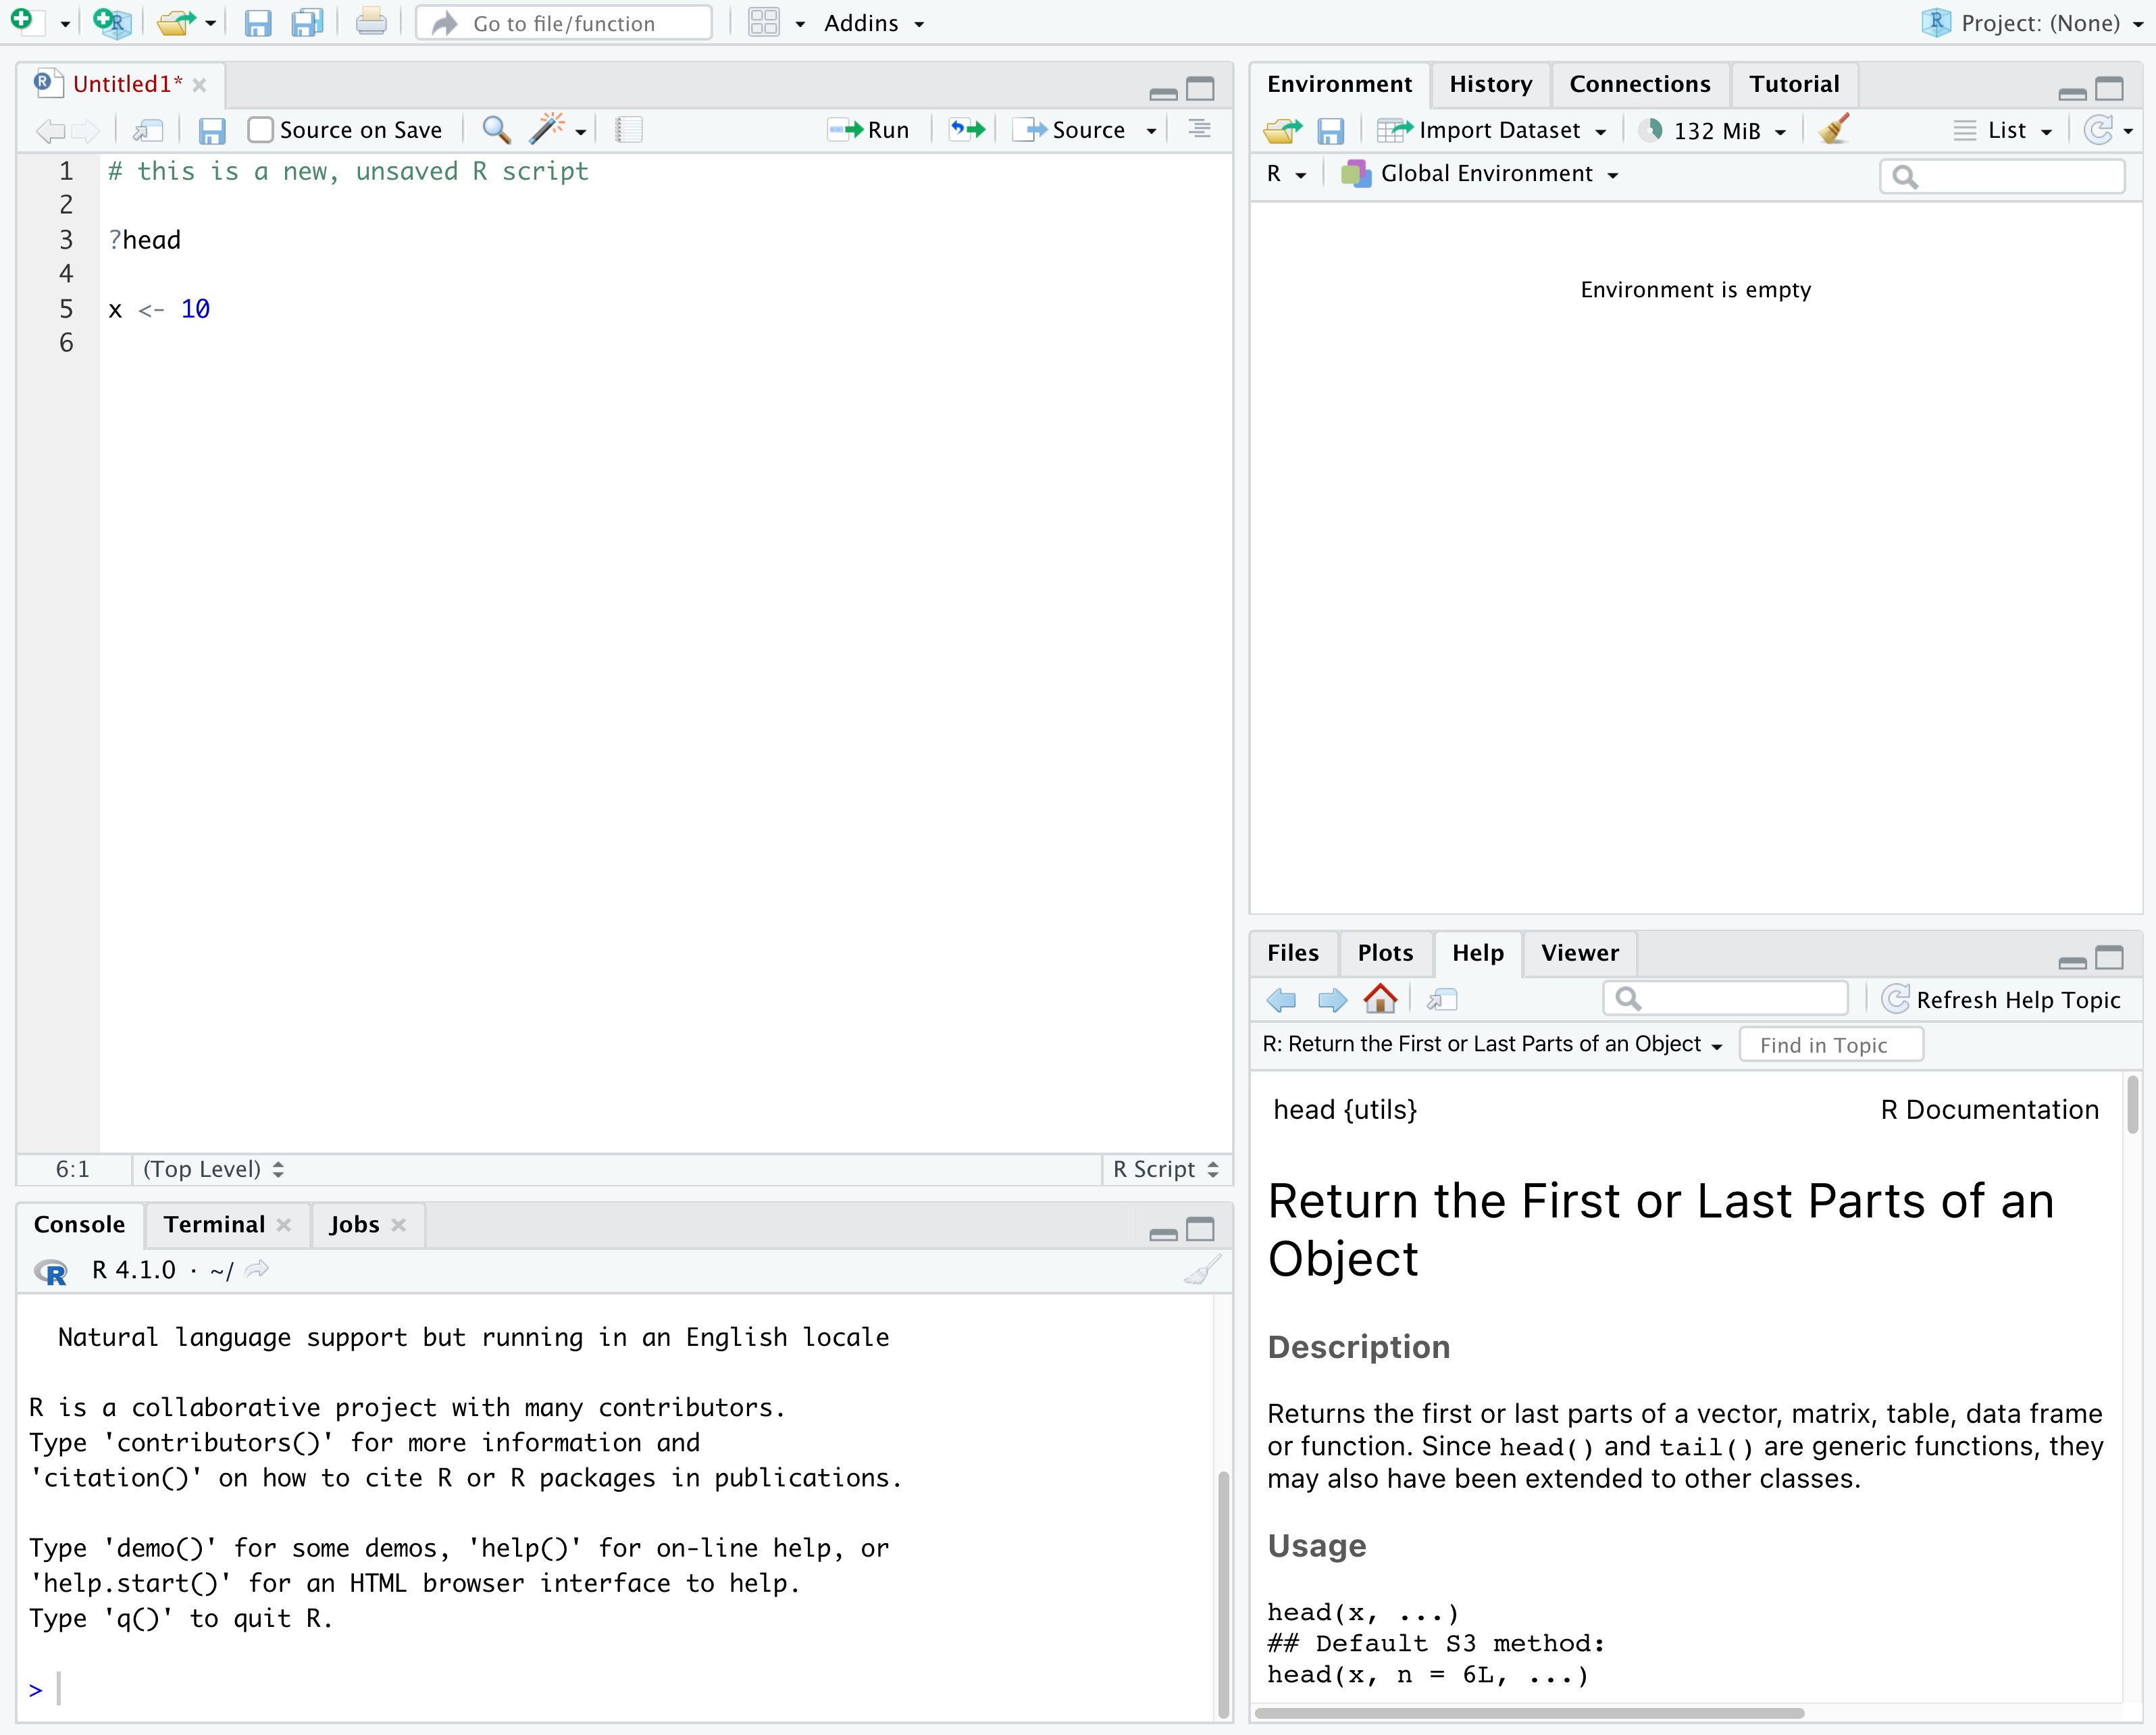
In the above screenshot, we can see 4 panes. If you only have 3 panes, and the Console pane is in the top left, press Shift+Cmd+N (Mac) or Shift+Ctrl+N (Windows) to open a blank R script, which should make the Source pane appear.
Let’s examine the project files using the Files pane.
It is a good practice to organize your projects into self-contained folders. Your project should start with a top-level folder that contains everything necessary for the project, including data, scripts, and results, all organized into subfolders.
project_folder
│
└── .devcontainer*
│
└── .gitignore*
|
└── data
│    └── cleaned
│    └── raw
│
└── project.Rproj
│
└── readme.md*
|
└── results
│
└── scripts
    └── exercises*
    └── lesson-scripts*
We have a data folder containing cleaned and raw sub-folders. In general, you want to keep your raw data completely untouched, so once you put data into that folder, you do not modify it. Instead, you read it into R, and if you make any modifications, you write that modified file into the cleaned folder. The results folder is for any other documents you might produce. The scripts folder holds any scripts we write. We have a lesson-scripts subfolder that has all the code from the lesson, and a exercises subfolder for the lesson exercises.
RStudio provides a “Projects” feature that can make it easier to work on individual projects in R. RStudio projects have a xxx.Rproj file. Clicking on a .Rproj file will start RStudio.
One of the benefits to using RStudio Projects is that they automatically set the working directory to the top-level folder for the project. The working directory is the folder where R is working, so it views the location of all files (including data and scripts) as being relative to the working directory.
Since the workshop is hosted on Github, we also have some additional files. .devcontainer has instructions on how to create Github Codespaces. .gitignore lists files and folders that Git should not track. readme.md gives a basic description of this project. Github displays the readme on the repository webpage. If you run R and RStudio on your own computer, then you don’t need these additional files.
Programming is writing instructions for a computer. We refer to those instructions as code. You can run those instructions directly in the R console, or you can write them into an R script.
> symbol, is where you can type commandsLet’s try running some code in the console.
First, click down in the Console pane, and type:
1 + 2[1] 3Hit Return or Enter to run the code. You should see your code echoed, and then the value of 3 returned.
.R extensionRun button above the editor panel# are considered comments and will not be interpreted as R code.Let’s create our first script.
You can make a new R script by clicking File → New File → R Script, clicking the green + button in the top left corner of RStudio, or pressing Shift+Cmd+N (Mac) or Shift+Ctrl+N (Windows). It will be unsaved, and called “Untitled1”
Now click into your blank script, and type:
1 + 2[1] 3With your cursor on that line, hit Cmd+Enter (Mac) or Ctrl+Enter (Windows) to run the code. You will see that your code was sent from the script to the console, where it returned a value of 3.
Save script files by using Cmd+S (Mac) or Ctrl+S (Windows). Give the script a descriptive name such as ‘first_script.R’. Save it in the scripts folder.
RStudio does not have an auto save. You need to manually save the files. You should save often.
When you change a file, the name of the file will appear red in the tab. That means the file has unsaved changes. When you save the file, the name turns black.
Sometimes we want to store values in memory so we can use it later. We can save values using the assignment operator <- (< less than and - hyphen).
object_name <- value
When there is <-, R creates an object, names the object object_name, and assigns value to the object. We use the object_name to access the value. Objects are shown in the Environment pane.
Let’s create price1 and price2 objects and assign them some values.
price1 <- 2
price2 <- 3
Now that we have the two objects saved in memory, we can do things with those objects. We can add the two prices.
price1 + price2[1] 5We can reassign new values to an existing object
price1 <- 10

price1 + price2
[1] 13We can do comparison of price1 and price2. The comparisons return TRUE or FALSE.
price1 == price2[1] FALSEprice1 > price2[1] TRUER comparison operators:
== equal
!= not equal
> greater than
>= greater or equal than
< less than
<= less or equal than
You should try to use a descriptive name when naming objects to help you remember what information is contained in the object.
Object names can contain letters, numbers, underscores and periods. They cannot start with a number nor contain spaces. If you want object names with multiple words use underscores, capital letters or periods
first_name <- 'Jane'
firstName <- 'Jane'
first.name <- 'Jane'If you have R and RStudio installed on your computer, you can skip this step.
We are using Github and Github Codespaces to host and run our code. When you create or edit a file, the changes are saved to Codespaces. You also need to save the changes to your repository. By saving the changes to your repository, you will have access to your files after the workshop ends.
Terminal is a program that allows you to write commands for the computer. To access the terminal, go to first the browser tab for Codespaces. Click “bash” in the bottom right, then click the “TERMINAL” tab.
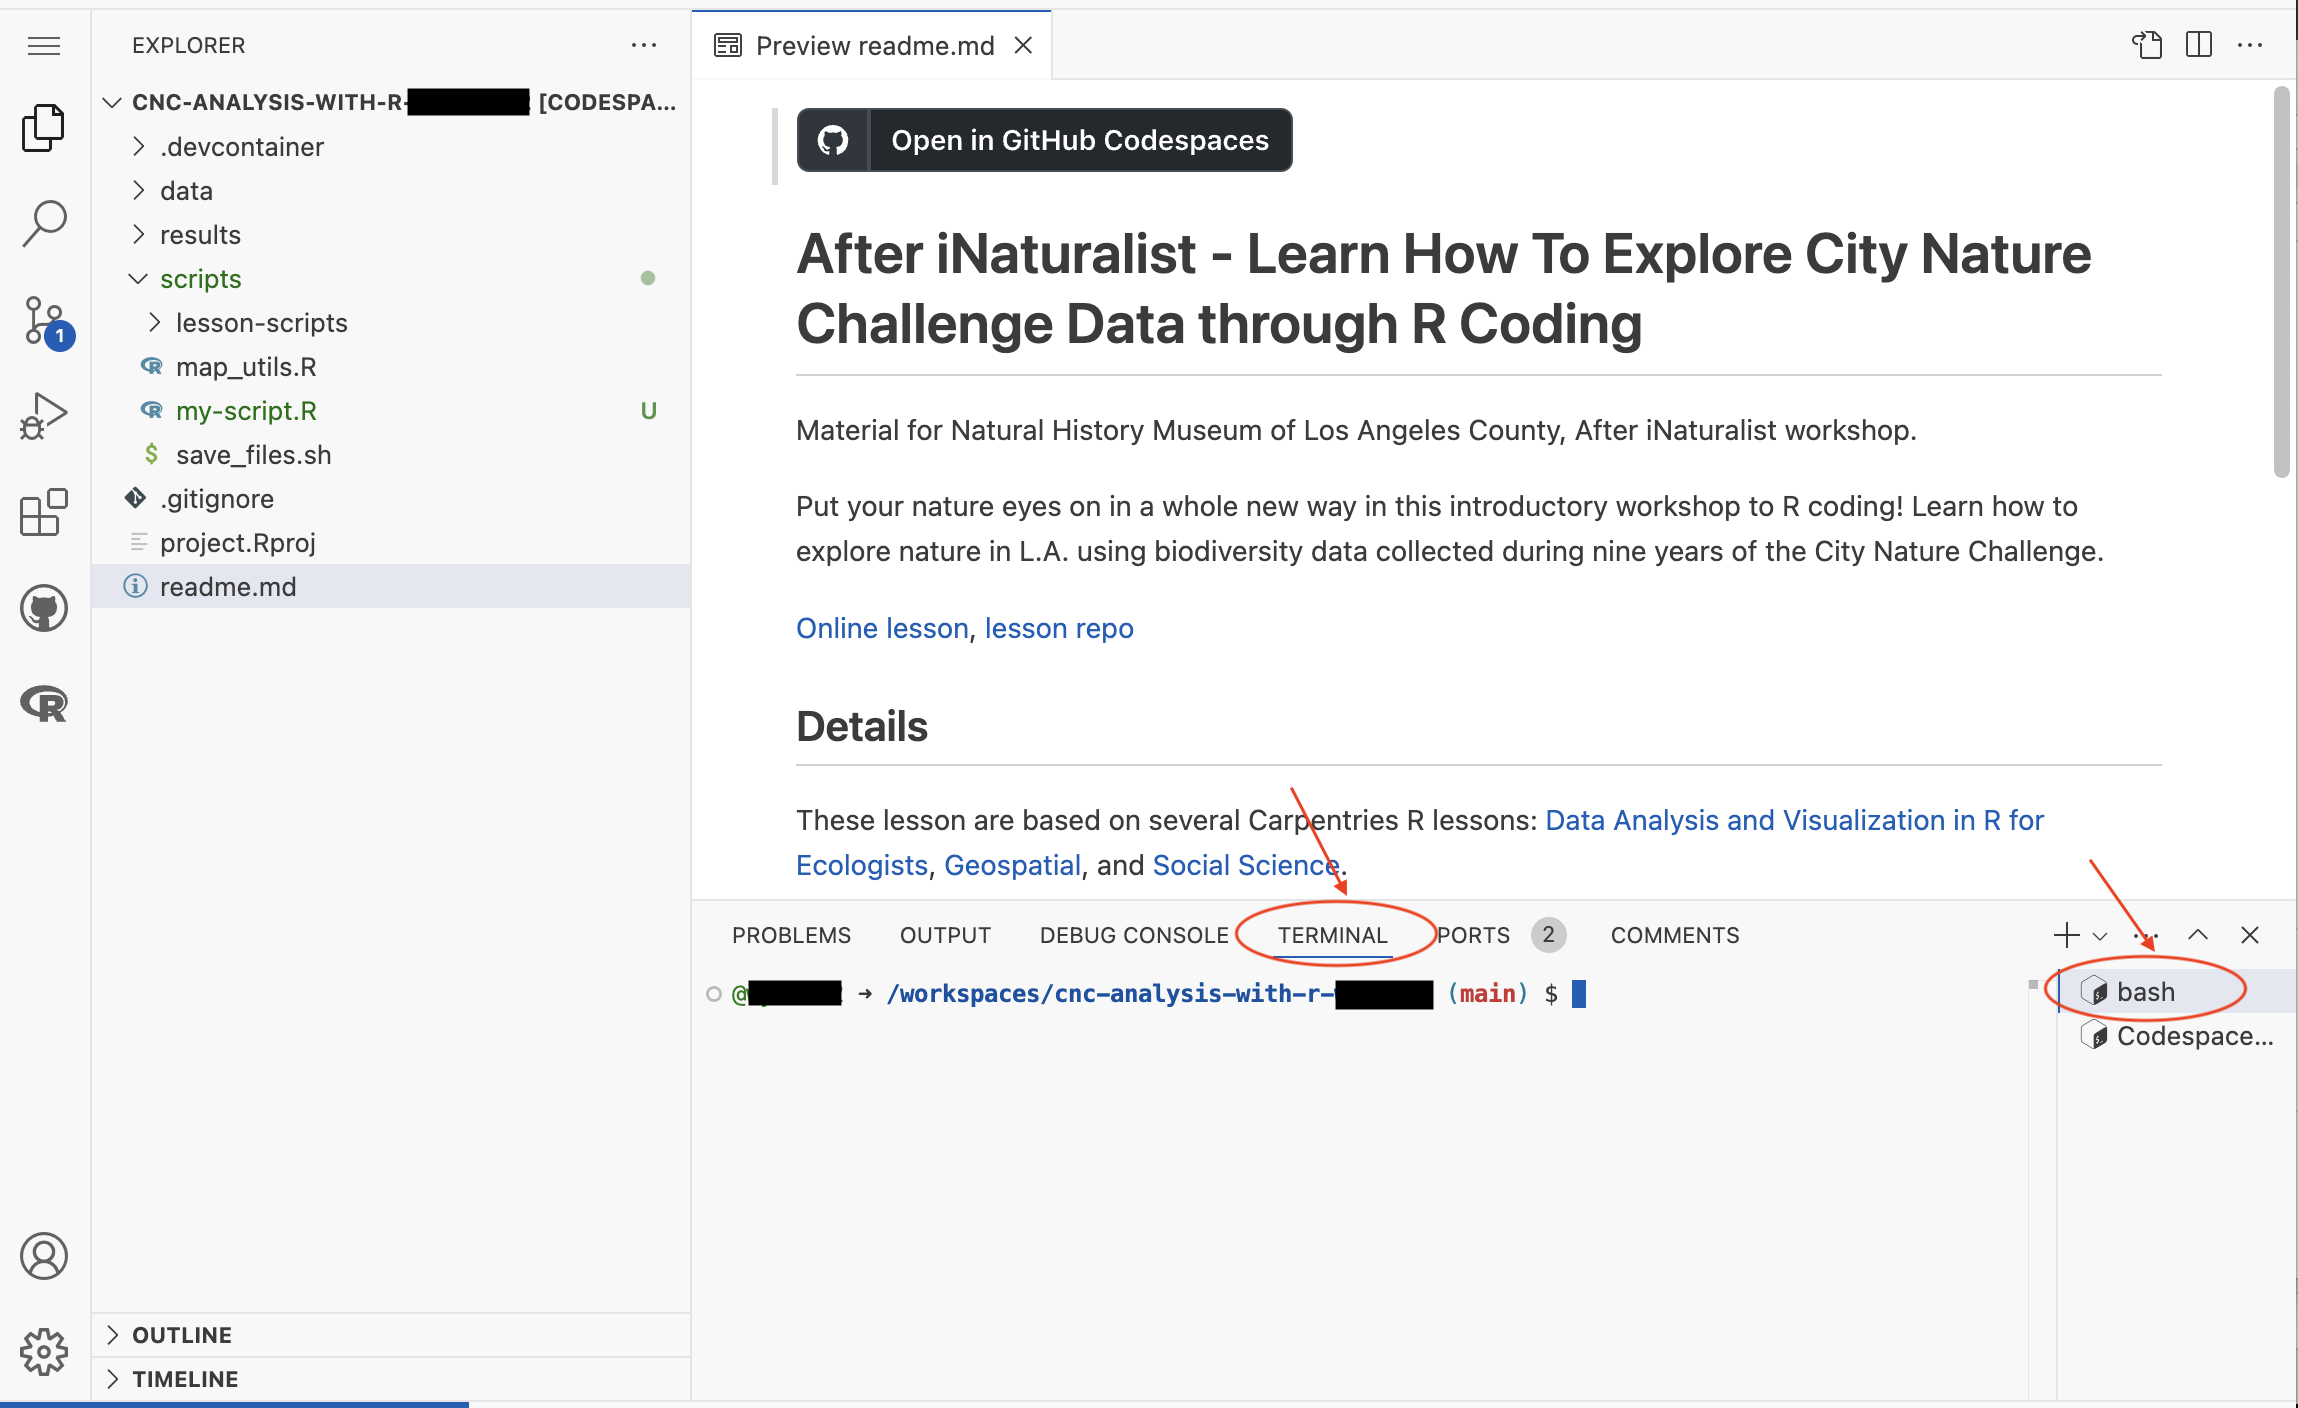
Click on the $. Then type the following command after the $, and hit enter.
bash scripts/save_files.sh
This will run a script called “save_files.sh” to save any changes you made to the repository.
When you are done coding for the day, you should run the save_files.sh script.
This script uses Git to update your repository. The script creates a git commit and pushes the commit to your repository. If you want to learn more about Git, watch this 14 minute Git tutorial.